
Small Desk Organization
How to Organize a Small Desk With No Drawers Without Losing Work Surface
A small drawerless desk gets crowded fast because the storage problem lands on the same surface you need to work. Keep only daily tools in one compact reach zone, then move the rest below, above, or beside the desk only when fit, reach, and clearance still work.
In This Guide
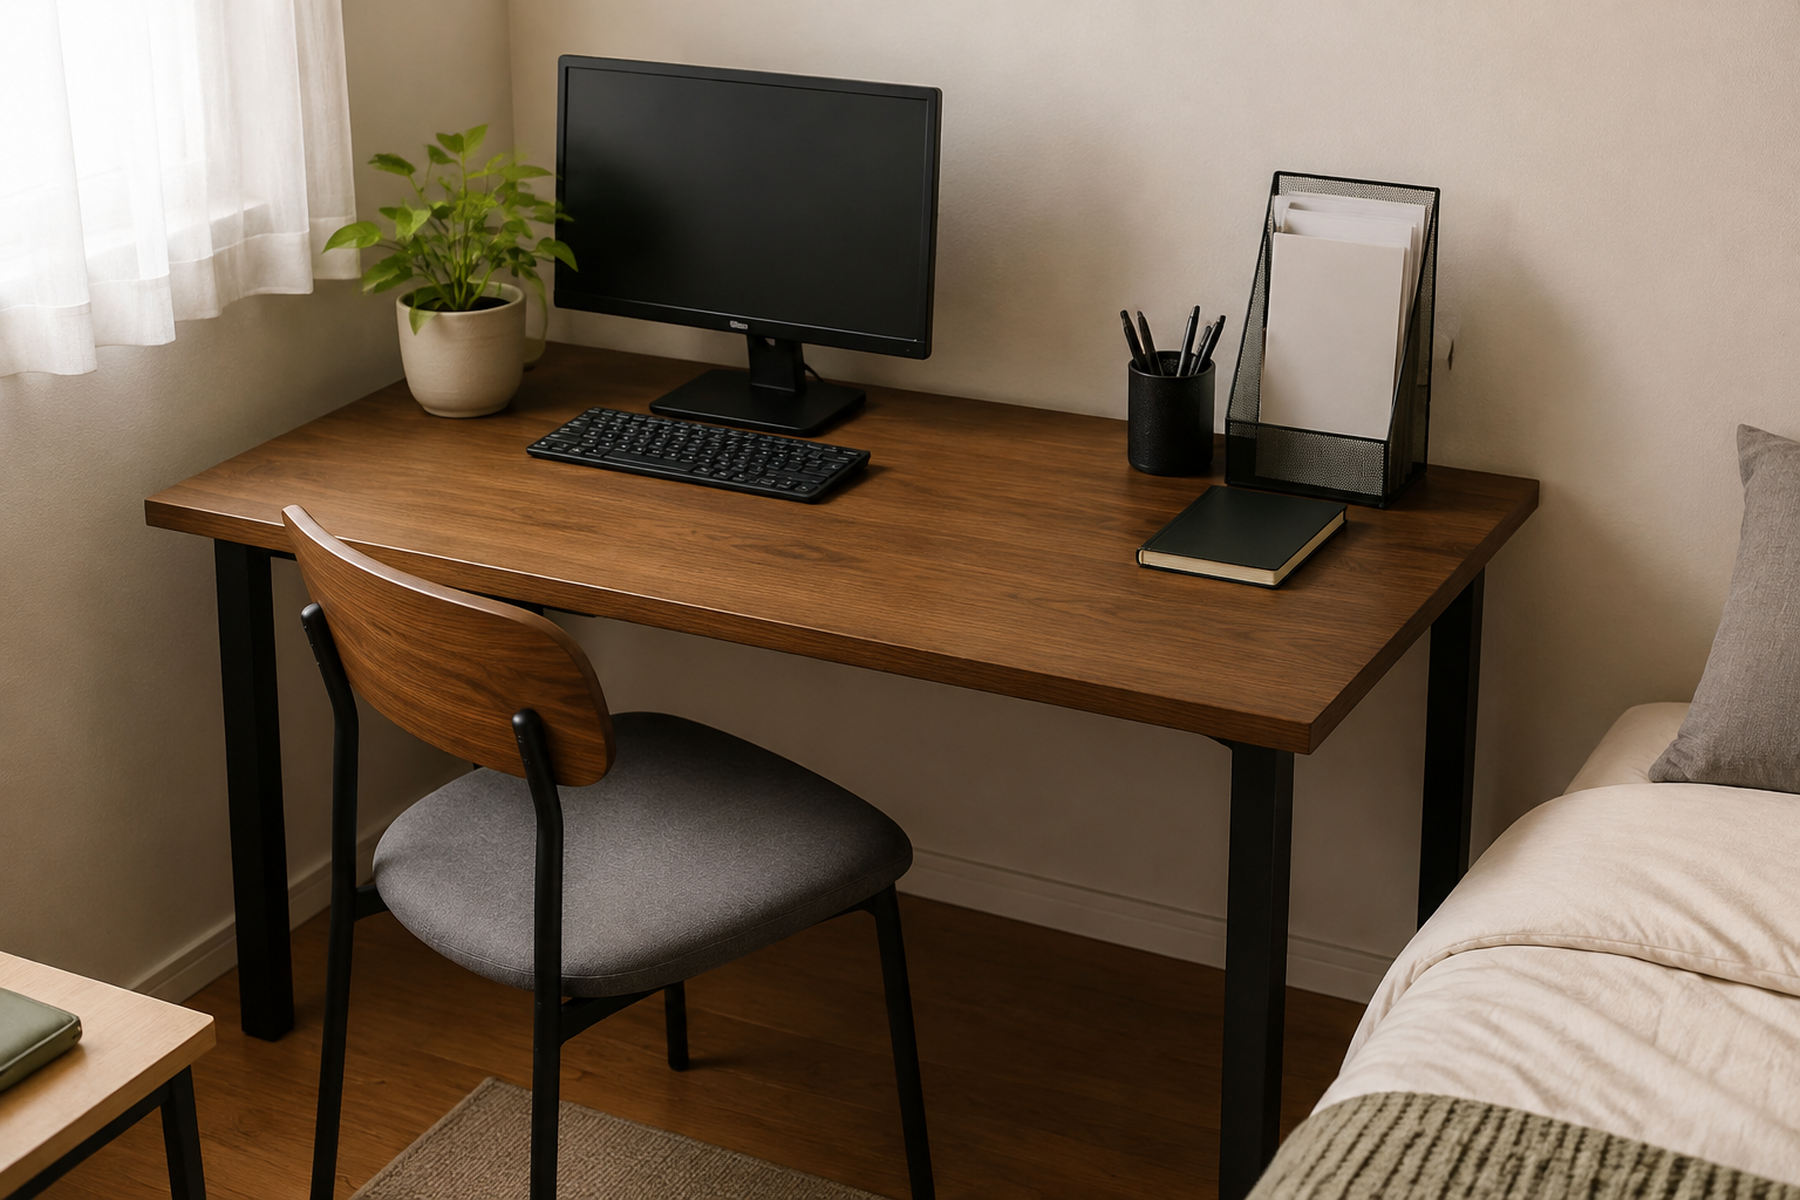
A desk with no drawers is not necessarily short on total storage. What it lacks is the shallow, immediate-access layer that normally holds pens, sticky notes, clips, small electronics, headphones, current notes, and other tools you reach for during the day. Without that layer, those items default to the desktop.
The useful fix is to rebuild access without turning the work surface into storage real estate. Decide what needs to stay within easy reach, then choose the next storage zone by the resource you can actually spare: a little surface area, under-desk clearance, vertical reach, nearby floor space, or permission to attach something.
Quick Answer
Give the Desk One Small Immediate-Reach Zone
Protect the active work surface first, keep only true daily-use supplies within immediate reach, and move backups to a slower zone. Replace the missing drawer with the storage option that costs the least useful desk, knee, vertical, or floor space, and verify the exact attachment geometry before using clamp-on or mounted storage.
01
Protect the active work area first
Keep the space needed for the computer, writing, current work, and normal hand movement clear before assigning any part of the desktop to storage.
02
Separate daily supplies from backup supplies
Keep only the tools and current materials you genuinely use during a normal work session at the desk. Move duplicates, refills, spare cables, and occasional items to a slower storage zone.
03
Replace the missing drawer with the least costly zone
A compact desktop organizer spends surface area, an under-desk drawer spends knee and equipment clearance, vertical storage spends reach and edge compatibility, and a rolling cart spends floor space.
01
Protect the Work Surface Before You Add Organizers
Start by looking at the desk while it is actually being used. A laptop or monitor may already control much of the depth, while a keyboard, mouse, notebook, lamp, or current document needs the remaining area. The empty-looking corners in a staged photo may disappear as soon as real work begins.
Temporarily remove loose supplies and mark the area that must stay open for the work itself. That may be the center of the desk, the writing side next to a laptop, or the front edge where your arms and notebook normally land. Treat that working zone as protected space rather than the first place to put a tray.
A desktop organizer earns its footprint only when it contains necessary daily items more efficiently than those items would spread on their own. If a large caddy holds spare pens, extra chargers, old notes, and rarely used tools, it can look tidy while still taking too much of the desk.
02
Separate Daily Supplies From Backup Supplies
Drawerless desks become easier to organize when access priority is decided before storage products. Make one group for things you need during a normal work session and another for backup or occasional supplies.
The daily group might include a working pen, a highlighter, headphones, a current notebook, one charging accessory, and the paper tied to the task in front of you. The exact list will vary by work, school, hobbies, and accessibility needs; there is no useful universal item count.
Backup pens, refills, spare cables, batteries, old project notes, extra stationery, and less-used tools do not need to occupy the same reach zone. Moving those items farther away is not a failure of organization. It is how a small workstation reserves its fastest access for the things that actually support the workday.
03
Replace the Missing Shallow-Access Layer With One Compact Zone
A small drawer normally does one simple job well: it keeps shallow, frequently used objects together without spreading them across the surface. On a drawerless desk, recreate that function as deliberately as possible rather than adding several separate organizers.
One narrow caddy, small tray, compact tool cup, or shallow mini-drawer can work when its footprint is modest and every item inside deserves immediate access. A vertical current-file holder can be part of the same daily-use station when the papers are truly active and the file does not grow into long-term storage.
Keep this zone at the back or side of the desk when that position preserves the primary working area. Avoid building a decorative organizer cluster across the rear edge simply because each piece is individually small. Several compact products can still consume a large share of a small desktop when they are added without a single access plan.
A monitor riser with usable space below or inside can also create a shallow-access layer within an existing equipment footprint. Use that option only when the real monitor or laptop setup can tolerate the riser without creating another depth, height, or ergonomic problem; monitor placement itself belongs to a separate workstation decision.
Measure / Check First
Clamp-on storage can be useful for renters because some products attach to the desk instead of the wall, but “clamp-on” does not mean “fits every desk.” Manufacturer documentation for desk drawers, overhead shelves, and desk-mounted pegboard connectors shows that compatible desktop thickness and size ranges can be explicit and product-specific.
Measure the Desk Before You Clamp Anything On
01
Check the desktop edge and thickness
Measure the real clamping area and look underneath it. A desk apron, support rail, chamfered edge, cable tray, standing-desk control, or other hardware can block a clamp even when the top thickness looks acceptable.
02
Check the space below and behind the attachment
For under-desk storage, sit in your normal position and confirm that the drawer will not take needed knee, thigh, chair, crossbar, or equipment space. For an overhead or rear clamp, check monitor, lamp, cable, and wall clearance.
03
Verify the exact product instructions
Use the manufacturer’s stated fit range, load limit, mounting method, and surface restrictions for the product you are considering. Do not transfer a measurement or rating from one clamp system to another.
A no-drill attachment is useful only when it fits the desk and leaves the workstation comfortable to use. If the clamp solves surface clutter by creating a new clearance problem, it is the wrong exchange.
04
Use an Under-Desk Drawer Only If the Clearance Is Truly Spare
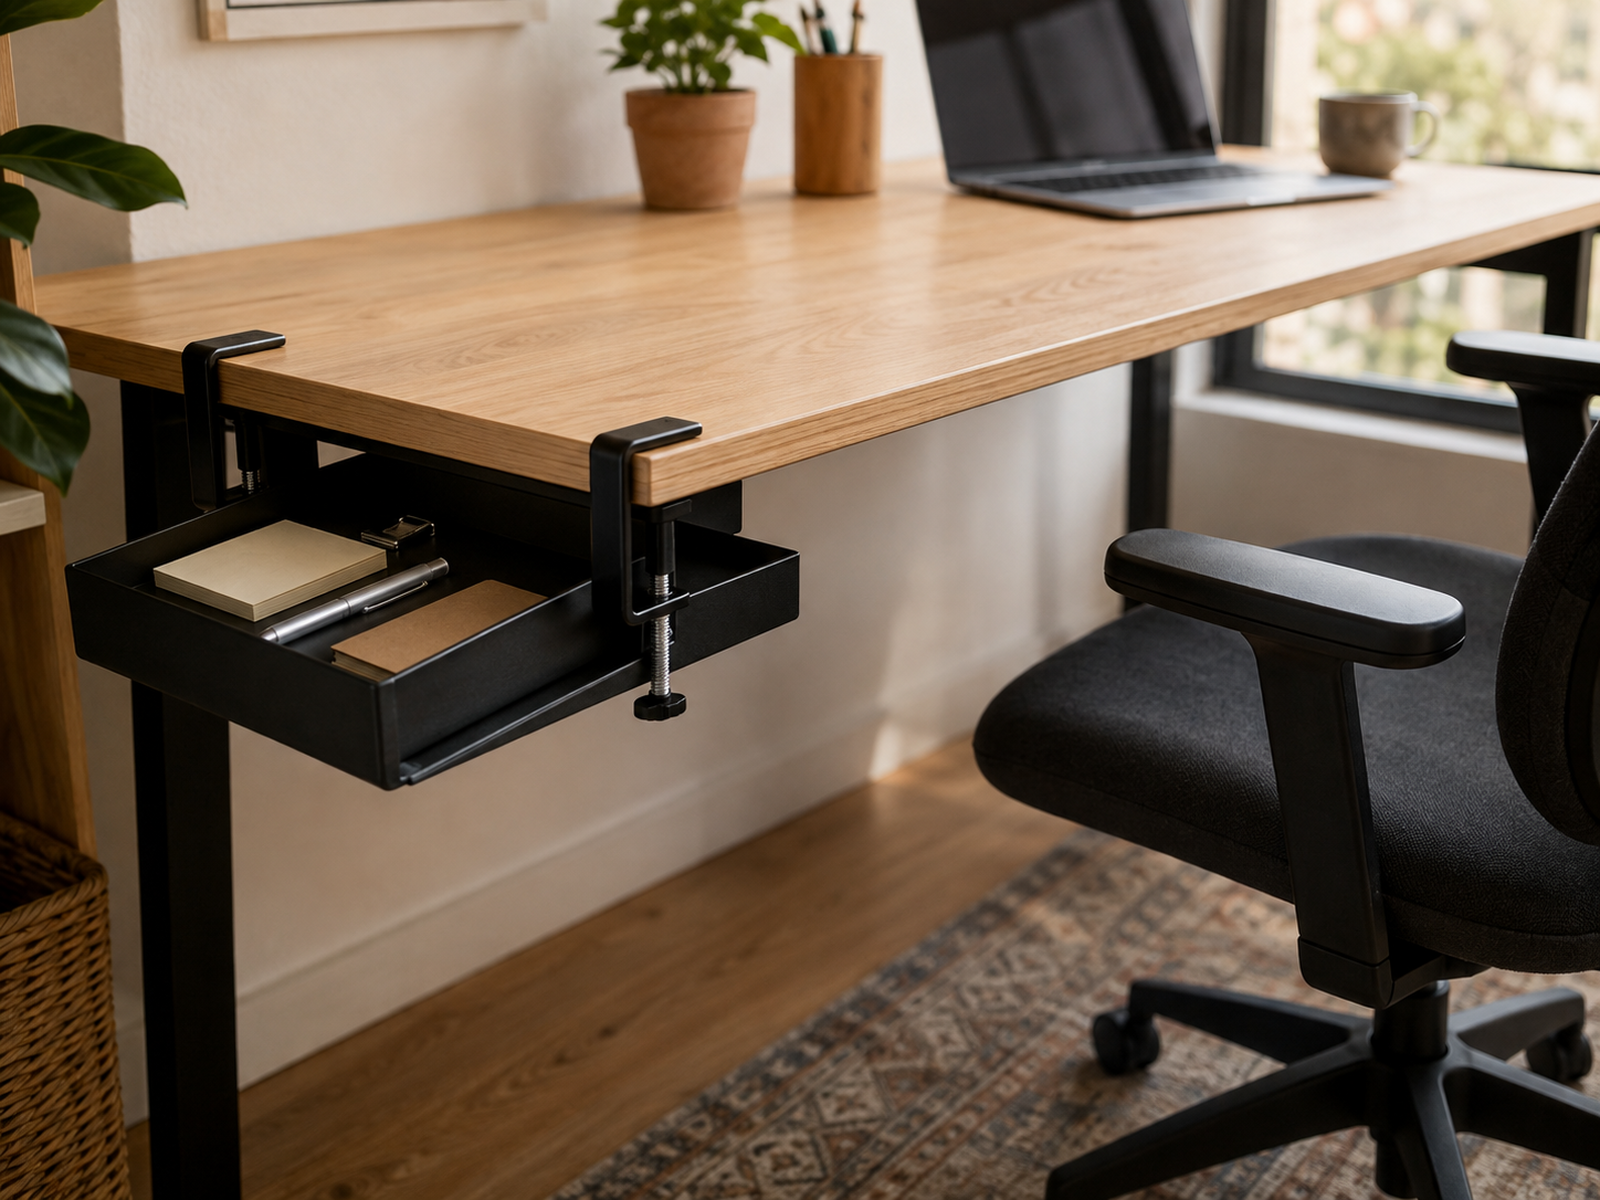
A clamp-on under-desk drawer is one of the closest replacements for the storage function the desk is missing. It can keep pens, sticky notes, small electronics, and other shallow supplies off the work surface without requiring a wall shelf.
The trade-off happens below the desktop. The drawer needs physical volume for the tray, clamp, and opening movement, and that space may already be serving your legs, chair, desk crossbars, cable trays, controls, or sit-stand movement. A drawer that fits the edge but presses into your normal seated position is not a space-saving solution.
Before buying, measure the intended attachment point and mimic the drawer depth with a simple temporary reference such as a piece of cardboard held in place. Sit, roll the chair in and out, and use the desk normally. The useful test is whether the storage disappears from your working motion, not whether it can technically attach.
05
Use Vertical Storage Only When Reach and Desk Geometry Work
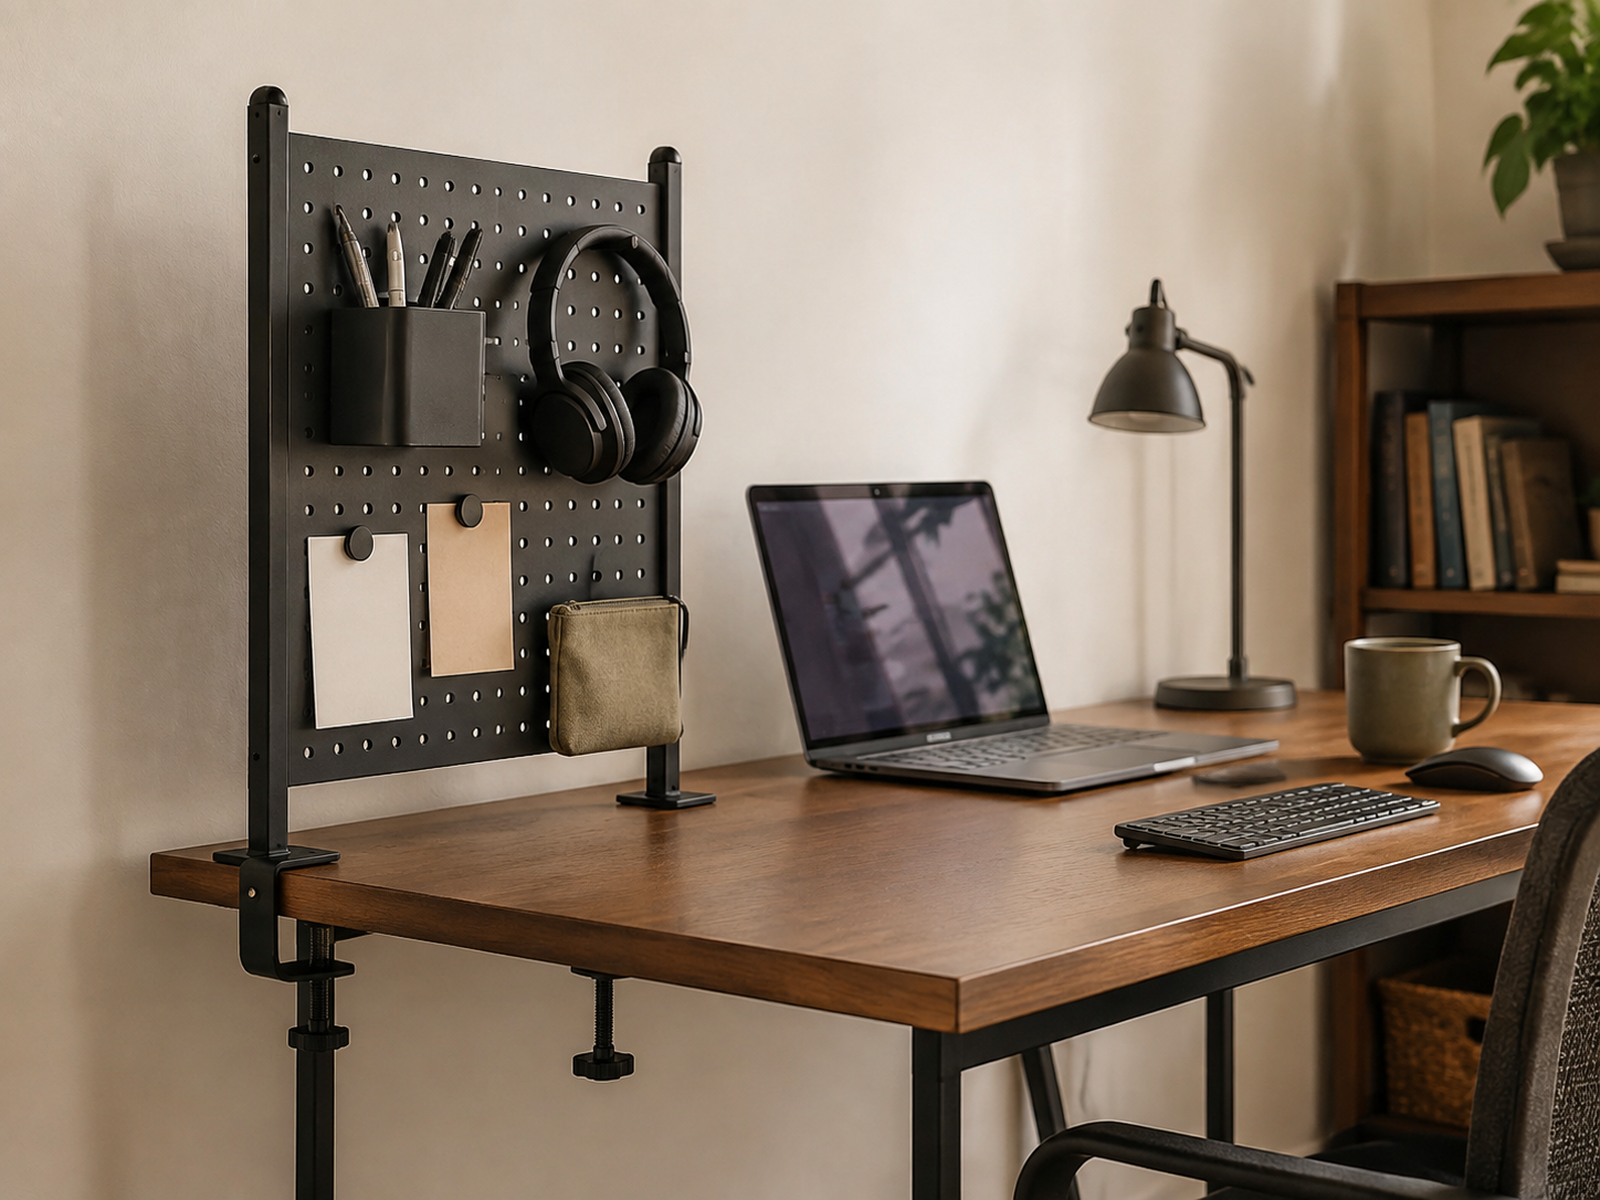
Moving supplies upward can preserve the desktop, but vertical storage is not automatically the best small-space answer. Wall-mounted shelves and pegboards may require drilling, while desk-mounted versions depend on a compatible clamp or connector. Either approach also changes what you have to reach for during the day.
A desk-clamped pegboard can be effective for lightweight tools, headphones, small cups, and current notes when the board is easy to reach from the normal seated or standing position. Keep the board visually controlled: the purpose is to relocate a defined set of useful items, not to fill every hook simply because vertical capacity exists.
The same principle applies to a clamp-on overhead shelf. It may create useful storage above the desk, but only if the rear edge is accessible, the shelf clears the equipment below, and the stored items remain safe and easy to retrieve. Avoid putting heavy or fragile objects overhead just to make the desktop look emptier.
Reach is personal. A shelf that looks efficient in a photo may be impractical for someone who cannot comfortably reach high storage from their working position. Use vertical space as one option in the hierarchy, not as a rule every small desk has to follow.
06
Treat Adhesive Storage as Surface-Specific, Not Automatically Damage-Free
Adhesive hooks and lightweight organizers can add storage without drilling, but the renter-friendly claim depends on the actual product and surface. Manufacturer guidance can limit use to particular smooth surfaces and exclude wallpaper, rough masonry, textured walls, or other finishes.
Check the product’s preparation, load, wait-time, surface, and removal instructions before using it. Paint condition, finish, and removal technique can matter, so “removable” should not be translated into a universal promise of zero damage.
For a desk article, adhesive storage is usually a supporting option rather than the first system to build around. If a compact desktop zone, compatible clamp, or nearby freestanding storage solves the problem without adding surface uncertainty, those paths may be easier to verify and reverse.
07
Move Backup Storage Beside the Desk Only If the Floor Can Spare It
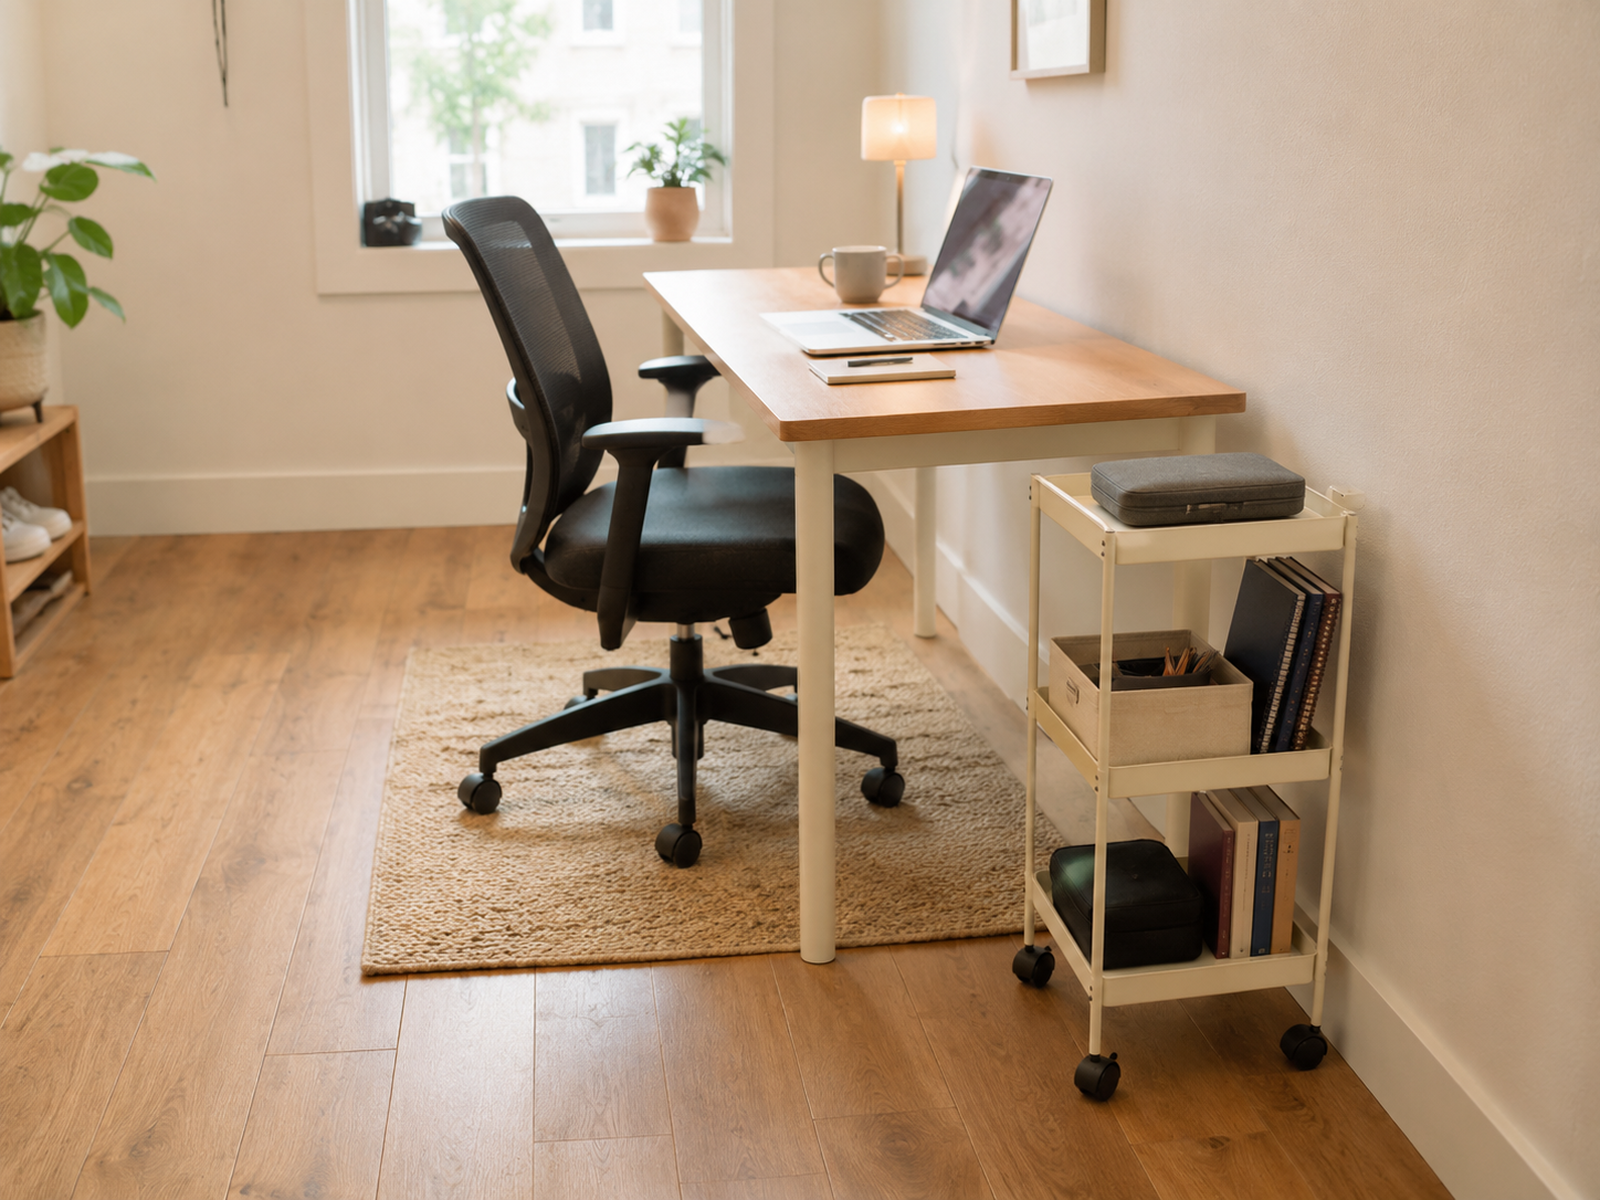
A rolling cart or small freestanding drawer unit can move a large amount of backup material off the desk while keeping it close enough for regular use. This is especially useful when the desk itself has almost no storage but the room has a narrow residual zone beside it.
That capacity is not free. The cart needs floor area, and the best-looking position may be exactly where the chair rolls, a door opens, or someone walks through the room. Place it outside the chair path and normal circulation rather than squeezing it into the workstation simply because the footprint is narrow.
Use the cart for slower-access categories: extra stationery, spare electronics, notebooks that are not current, reference materials, or supplies used only for certain tasks. If the top tray becomes a second desktop covered with active clutter, the system has recreated the original problem one step to the side.
An existing nearby shelf or bookcase can serve the same purpose without adding another piece of furniture. When the room already contains usable storage, the small-space win may come from assigning that capacity better rather than buying storage specifically for the desk.
08
Keep Active Paper Vertical and Keep Archives Out of This System
Current paper deserves a nearby home only when it is actually part of current work. A slim vertical file, magazine holder, or defined inbox can keep a few active sheets visible without letting them spread into horizontal piles across the writing area.
Give the holder a narrow job: work in progress, forms waiting for action, or papers needed for the present project. Process or relocate material when it stops being active. A small desk cannot protect its surface if the “current” file quietly becomes a permanent archive.
Long-term records are a different storage problem. Tax documents, household records, identity paperwork, school files, and other archival material have retention, privacy, and retrieval requirements that are outside this guide. Keeping that boundary clear prevents a desk-organizing project from turning into an unsupported document-management system.
What Not to Do
Avoid Fixes That Move the Clutter Into a More Expensive Zone
- Cover the desk with matching organizers
Containment is not the same as surface efficiency. Keep one compact immediate-reach zone instead of several products competing with the work area. - Assume every clamp fits every desktop
Edge thickness, underside obstructions, rails, controls, cable trays, and material restrictions can all change compatibility. - Move everything to the wall or high shelf
Vertical storage can require drilling and may be difficult or impossible for some users to reach comfortably. - Call adhesive storage damage-free
Surface compatibility and removal behavior are product-specific. Follow the exact manufacturer instructions instead of relying on a broad renter-friendly label. - Put a drawer where your knees already need to go
Under-desk storage preserves desktop area by spending volume below it. Test the seated and chair-clearance relationship before committing.
Decision Sequence
Choose the Storage Zone in This Order
01
Keep only true daily-use items at the desk
Remove backups, duplicates, inactive paper, and occasional tools from the immediate-reach inventory before adding storage.
02
Give the remaining daily items one compact home
Use the smallest practical surface zone or an existing equipment footprint that keeps retrieval fast without interrupting the work area.
03
Recreate shallow storage below the desk when clearance allows
A compatible clamp-on drawer can be a strong next step when it does not interfere with knees, chair movement, controls, cables, or desk structure.
04
Move backups beside or away from the desk
Use a cart, drawer unit, or existing nearby storage only when the floor and circulation can spare it. The least-used supplies can tolerate the slowest retrieval.
Closing Decision
Let the Work Surface Stay a Work Surface
A drawerless desk does not need to imitate a large office desk with storage added on every side. It needs a clear access hierarchy. Keep the daily working set small, rebuild one shallow-access zone, and let backup supplies live in a slower location.
When you compare storage options, ask what each one costs: desktop area, knee space, edge compatibility, vertical reach, wall permission, or floor space. Choose the option that spends the resource your room and your body can actually spare. That is more useful than maximizing how many organizers can fit around the desk.
RELATED GUIDES
Related Guides
NEXT GUIDE
How to Use a Monitor on a Shallow Desk Without Losing Usable Depth
Use this when monitor placement or a riser is consuming the depth needed for active work.
GUIDE
How to Move a Printer Off a Small Desk Without Losing Access
Use this when intermittent-use equipment is consuming desktop area that should remain available for daily work.
GUIDE
How to Manage Cables on a Small Desk Without Drilling
Use this when cable clutter is competing with the same limited work surface or under-desk attachment zone.